Apple Pie
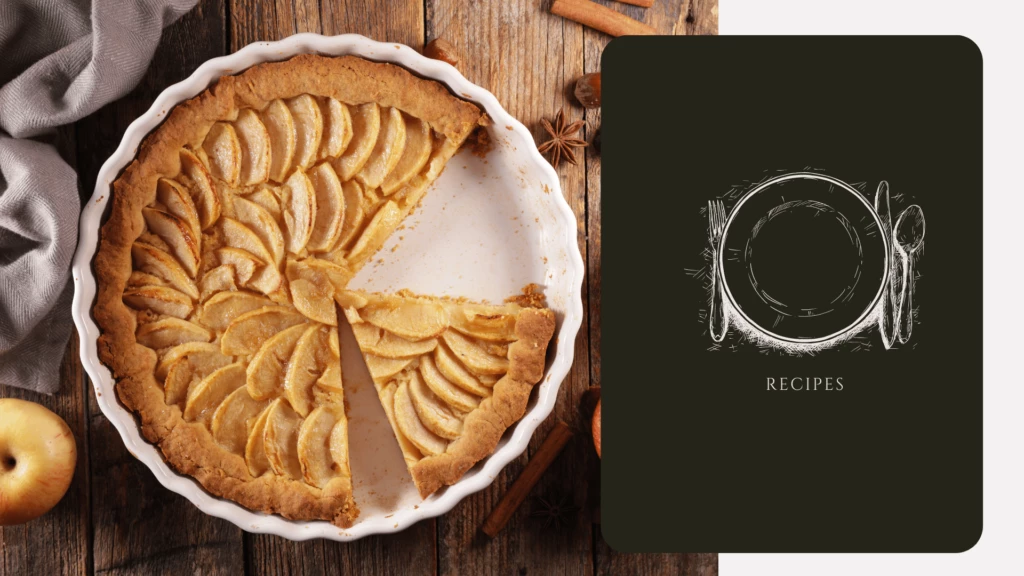
Whether you’re looking for the perfect dessert for Thanksgiving or Christmas, or are just in the mood for the sweet taste of cinnamon and apples this apple pie recipe will always hit the spot.
Baking is no easy feat and I never profess myself to be a baker! Personally, there’s too much risk associated with baking in my books. Measurements always need to be precise and your timing needs to be impeccable. What’s more is that when it comes to baking there is not only this expectation that your dessert will taste delicious, but also that it will look magazine worthy.
Fortunately for us, this doesn’t seem to be the case with Apple Pie. Apple Pie has this ability to look delicious even with imperfections and is gracious enough to all for some wiggle room when baking. For this recipe you’ll need a 9″ pie dish, wax paper, a rolling pin and if your heart desires some pie cutters. Any of these would also make a cute gift to give to a host for Thanksgiving or Christmas. Simply bake a pie in a cute pie plate and give to your hostess to keep. Take things up a notch by adding in the rolling pin and pie cutters and wrapping it in cello!
Prep Time: 45 Minutes
Cook Time: 1 Hour
INGREDIENTS
Yields 1 pie
- 1 pkg Crisco Shortening for Pie Crust
- 7-8 large Granny Smith or Honeycrisp Apples
- ½ cup granulated sugar
- ½ cup light brown sugar (loosely packed)
- 2 tablespoons all-purpose flour
- 1 teaspoon ground cinnamon
- ⅛ teaspoon ground nutmeg
- 1 tablespoon lemon juice (plus the zest of half of a lemon)
- 1 large egg (lightly beaten in a small bowl for egg wash)
METHOD
- Make your pie crust by following the directions on the back of the Crisco Shortening Box.
- Peel, core and slice the apples. In a large mixing bowl, gently toss the apple slices, granulated sugar, light brown sugar, flour, cinnamon, nutmeg, lemon zest and lemon juice until well combined and set aside.
- Preheat oven to 400º.
- Remove discs of pie dough from your fridge and place onto a large sheet of wax paper on your counter. Lightly flour your wax paper and roll out the dough on top of the wax paper. (The wax paper allows for an easy transfer to your pie plate)
- Transfer to the pie plate.
- Add the apple pie filling into the crust and spread out evenly.
- Following the same directions as above, roll out the second disc of pie dough. Place the crust over the apple pie filling. Alternatively, you can also use the pie cutters to cut out shapes and use this as your crust.
- Use a sharp knife to trim the excess dough from around the edge of the pie plate.
- Gently pull both the bottom and top pie crust up and away from the edge of the pie plate. Fold the edge under itself and press down firmly to seal the edge in place. Repeat this process until all edges are sealed.
- Gently brush the surface of the dough with an egg wash and sprinkle sugar on top. Use a sharp knife to cut vents in the crust.
- Create a “pie shield” by wrapping aluminum foil around the edge of your pie plate to prevent the edges of the pie from over browning.
- Bake at 400°F for 25 minutes. Remove the pie shield and lower to 375°F. Bake for an additional 30-35 minutes.
You May Also Like
Easy Banana Bread Crumb Cake to Make this Spring
20 March 2023
Spinach & Goat Cheese Stuffed Chicken Breast
20 May 2022